GridSplitter for UWP Quick Start
In This Topic
In this Quick Start, you create a new Universal Windows application in Visual Studio, set up a Grid, and add the C1GridSplitter control to your application.
Complete these steps:
- Create a new Universal Windows application in Visual Studio:
- Select File | New | Project from the File menu. The New Project dialog box will open.
- Select Templates | Visual C# | Windows | Universal. From the templates list, select Blank App (Universal Windows).
- Give your project a Name, and select OK. Your new project will open.
- Locate the References folder in the Solution Explorer. Right-click the folder and select Add Reference.
- In the Reference Manager, expand Universal Windows and select Extensions; you should see the UWP assemblies in the center pane.
- Select C1.UWP.dll from the center pane.
- Select OK to add the reference to your application.
- Locate the <Grid> </Grid> tags in your MainPage.xaml file.
- Add the following Grid.RowDefinitions and Grid.ColumnDefinitions to your application. The XAML markup should resemble the following:
| XAML |
Copy Code
|
<Grid Background="{ThemeResource ApplicationPageBackgroundThemeBrush}">
        <Grid.RowDefinitions>
            <RowDefinition Height="100"/>
            <RowDefinition />
        </Grid.RowDefinitions>
        <Grid.ColumnDefinitions>
            <ColumnDefinition Width="160"/>
            <ColumnDefinition/>
        </Grid.ColumnDefinitions>

</Grid>
|
- Place your cursor below the closing </Grid.ColumnDefinition> tag. Locate the C1GridSplitter control in your Visual Studio Toolbox, and add two C1GridSplitter controls to your application.
- Edit your GridSplitter controls so that they resemble the following XAML markup:
| XAML |
Copy Code
|
<c1:C1GridSplitter Grid.Row="1" Grid.ColumnSpan="2" VerticalAlignment="Top" Height="16" ShowsPreview="True" />
<c1:C1GridSplitter Grid.RowSpan="2" Grid.Column="1" HorizontalAlignment="Left" Width="16" />
|
Note that you set the Grid Row and Column positions and the Vertical or Horizontal Alignment.
- Directly below the second C1GridSplitter control, add a general Rectangle control from your Toolbox and set the Fill property to "Red":
| XAML |
Copy Code
|
<Rectangle Fill="Red"/>
|
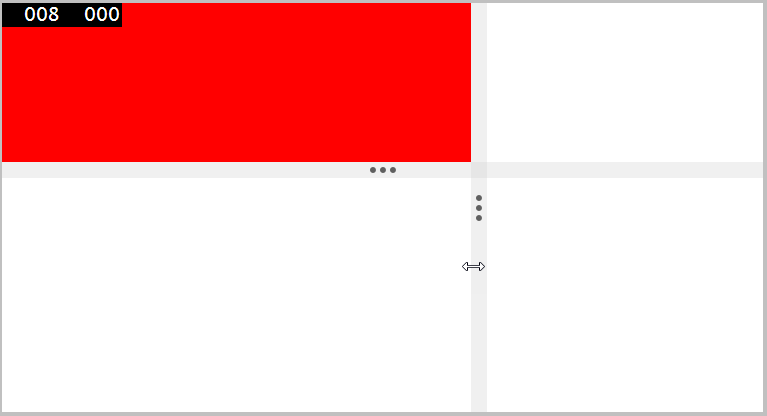
- Press F5 or start debugging to run your application. Moving the horizontal and vertical GridSplitters will enlarge or minimize the red Rectangle: